Blog

  • remove banned ip from microsoft ban lists

    This works for hotmail.com, live.com, outlook.com and possibly other microsoft related email addresses.

    Use this form to request removal:
    http://go.microsoft.com/fwlink/?linkid=614866

    Make sure you ‘re registered:
    https://postmaster.live.com/snds/data.aspx

    This was an old one and does not seem to work anymore:
    https://support.live.com/eform.aspx?productKey=edfsmsbl3&ct=eformts&scrx=1

    Source:
    https://answers.microsoft.com/en-us/outlook_com/forum/oemail-osend/hotmailoutlook-blacklist-removal-form/86c71c17-80c9-48e9-b822-1d3678f19673

  • osticket and self-signed-certificates on email server

    This has to do with PHP >= 5.6, where php changed its behavior with self signed certificates.  This has caused osticket users to keep old PHP versions in order to operate with self signed mail servers. But actually the fix is relatively simple:
    Go to {osTicket directory}/include/pear/Net/SMTP.php line 173 and change this line:

    ‘ssl’ => array(‘verify_peer_name’ => false)
    to this
    ‘ssl’ => array(‘verify_peer’ => false, ‘verify_peer_name’ => false)
    This was copied from http://osticket.com/forum/discussion/89767/authentication-failure-smtp
    (see KevinTheJedi answer on 2017 February 17)
    I copy the original response below:

    Do you have a test environment that is getting this issue with PHP 5.6 and osTicket 1.10?

    If so try something for me to see if your issue goes away (I am unable to replicate this error):

    1.) Go to {osTicket directory}/include/pear/Net/SMTP.php line 173 and change this line:

    ‘ssl’ => array(‘verify_peer_name’ => false)
    to this
    ‘ssl’ => array(‘verify_peer’ => false, ‘verify_peer_name’ => false)

    2.)Go to {osTicket directory}/include/pear/Mail/smtp.php line 141 and change this line:
    $timeout = null;
    to this
    $timeout = 60;
  • rename mysql database using command line

    mysqladmin -u username -p create NEW_DB_NAME
    mysqldump -u root -pPASSWORD OLD_DB_NAME|mysql -u root -pPASSWORD NEW_DB_NAME

  • rsync including hidden files and differences with scp

    rsync including hidden files and differences with scp

    rsync -av --progress src/ user@server:dest/

    scp should also do the job but rsync is better

    scp -rp src user@server:dest/

    Nice explanation about the differences can be found here:
    http://stackoverflow.com/questions/20244585/how-does-scp-differ-from-rsync

    scp basically reads the source file and writes it to the destination. It performs a plain linear copy, locally, or over a network.

    rsync also copies files locally or over a network. But it employs a special delta transfer algorithm and a few optimizations to make the operation a lot faster. Consider the call.

    rsync A host:B
    rsync will check files sizes and modification timestamps of both A and B, and skip any further processing if they match.
    If the destination file B already exists, the delta transfer algorithm will make sure only differences between A and B are sent over the wire.
    rsync will write data to a temporary file T, and then replace the destination file B with T to make the update look “atomic” to processes that might be using B.
    Anther difference between them concerns invocation. rsync has a plethora of command line options, allowing the user to fine tune its behavior. It supports complex filter rules, runs in batch mode, daemon mode, etc. scp has only a few switches.

    In summary, use scp for your day to day tasks. Commands that you type once in a while on your interactive shell. Its simpler to use, and in those cases rsync optimizations won’t help much.

    For recurring tasks, like cron jobs, use rsync. As mentioned, on multiple invocations it will take advantage of data already transferred, performing very quickly and saving on resources. It is an excellent tool to keep two directories synchronized over a network.

    Also, when dealing with large files, use rsync with the -P option. If the transfer is interrupted, you can resume it where it stopped by reissuing the command.

  • laravel 5 and language set locale

    https://mydnic.be/post/laravel-5-and-his-fcking-non-persistent-app-setlocale

  • how to add a second erpnext instance on ubuntu

    how to add a second erpnext instance on ubuntu

    Assuming you have followed my previous guide on installing erpnext on a fresh ubuntu instance (http://blog.grs.gr/?p=518&lang=en), we will show you how to install a second site on the same server (DNS based multitenancy).

    (more…)

  • how to install erpnext on ubuntu

    how to install erpnext on ubuntu

    This guide is based on https://github.com/frappe/bench, and is tested a couple of times against ubuntu 14.04/64.

        • Login as root with ssh.
        • Optionally:
          apt-get update
          
          apt-get upgrade
          
          dpkg-reconfigure tzdata
          
          apt-get install nano
          
        • Add a user (erpnext for our example).
    adduser erpnext

    Store password in a safe place for later use.

        • visudo (to grant erpnext user sudo privileges, by copying root record)

    A nice article on user management: https://www.digitalocean.com/community/tutorials/how-to-add-and-delete-users-on-an-ubuntu-14-04-vps

    • Login as erpnext.
      su erpnext
    • Download script at home dir and execute it.
    cd ~
    wget https://raw.githubusercontent.com/frappe/bench/master/playbooks/install.py
    sudo python install.py --production --user erpnext
    

    You will prompted for mysql and admin passwords.
    Store both passwords in a safe place for later use.

    The script is going to take some moments to complete depending on hardware, let’s say 5 or 10 minutes.

    • Restart web server, sudo service nginx restart.
    • Fire up your browser and point to your server’s IP (or hostname). If everything goes well you will see eprnext login screen. Use your stored admin pass to access web app. Eventually a nice setup wizard will show up at your browser.

    You’re amost done. To increase security you should install ssl. We’ll use let’s encrypt for our example.

      • su erpnext
      • cd ~
      • cd frappe-bench
      • Important! Assuming your domain is example.com: mv sites/site1.local sites/example.com
      • nano sites/example.com/site_config.json
      • Add "host_name": "https://example.com",

    Don’t forget commas separating json records.

    • Enable dns multitenancy: bench config dns_multitenant on
    • Regenerate nginx config: bench setup nginx
    • Reload nginx: sudo service nginx reload
    • Configure let’s encrypt: sudo -H bench setup lets-encrypt example.com

    If errors occur, recheck all your steps. If https/ssl still fails, try the manual method below.

    • su root
    • cd /opt
    • wget https://certbot.eff.org/
    • sudo service nginx stop
    • ./opt/certbot-auto certonly --standalone
    • su erpnext
    • cd ~/frappe-bench/sites/example.com
    • nano sites/example.com/site_config.json
    • Add two lines, beware of the commas separating json records! "ssl_certificate": "/etc/letsencrypt/live/example.com/fullchain.pem",
      "ssl_certificate_key": "/etc/letsencrypt/live/example.com/privkey.pem"
      , save and exit nano
    • bench setup nginx, to regenerate cofig files.
    • sudo service nginx restart

    Now, you should be ok with letsencrypt cert. Letsencrypt certificate expires every three months, so you’d better set up a cronjob that automatically renew certificate. It should be as easy as adding a crontab entry.

    • crontab -e
    • Add this: # renew letsencrypt certificates on 1st monday of every month and get an email if it gets executed
      MAILTO="[email protected]"
      0 0 1-7 * * [ "$(date '+\%a')" = "Mon" ] && sudo service nginx stop && /opt/certbot-auto renew && sudo service nginx start

    You’re done.

    References

    Official frappe documentation provides an article for https/ssl:
    https://frappe.github.io/frappe/user/en/bench/guides/lets-encrypt-ssl-setup.html

    If you want to install a second site on the same server see this:

    how to add a second erpnext instance on ubuntu

  • install and configure policyd on zimbra

    Ahmad Imanudin has a nice series of tutorials on installing and configuring policyd on Zimbra.

    1. Install and enable web ui.

    How To Install PolicyD on Zimbra 8.5

    2. Password protect web ui with .htaccess

    Zimbra Tips: How To Protect Policyd WebUI

    3. Configure policyd using web ui

    Zimbra Tips : How To Configure Rate Limit Sending Message on PolicyD

    4. Reject unlisted domain using policyd web ui

    Improving Anti Spam : Reject Unlisted Domain On Zimbra 8.5


  • remote desktop (rdp) service on windows 10 home

    remote desktop (rdp) service on windows 10 home

    One of the main differences between Windows 10 Pro and Windows 10 Home is the lack of the remote desktop service for the latter. But thanks to this wonderful project rdp service is not a barrier any more.

    We have tested this solution in two different Windows 10 Home machines and it works great.

    • Download RDPWrap-vx.x.zip from https://github.com/binarymaster/rdpwrap/releases/ or click the direct link to the zip file v.1.6.
    • Extract the contents on your windows machine (this solution seems to work for 8.1 home and 8.1 starter – but we have only tested on windows 10). 2015-12-28 18_52_38-RDPWrap-v1.6
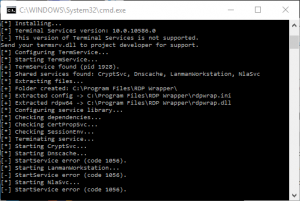
    • Right click on install.bat and run it as administrator. 2015-12-28 18_54_24-C__WINDOWS_System32_cmd.exe
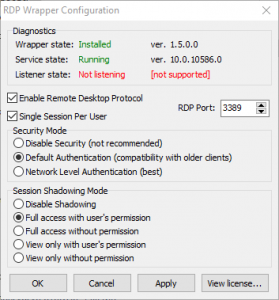
    • Run RDPConf and make appropriate changes. Default settings should be ok for testing, but later on we recommend at least to change security settings to Default Authentication. Network Level Authentication is the best choice but refuses connections from older machines (Windows XP). If you want to enable connections from Windows XP, choose Default Authentication. 2015-12-28 18_56_51-RDP Wrapper Configuration
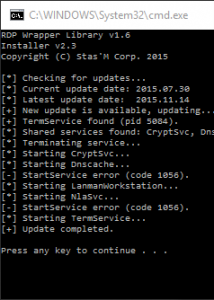
    • Try RDPCheck. If check fails, run update. 2015-12-28 18_57_34-C__WINDOWS_System32_cmd.exe
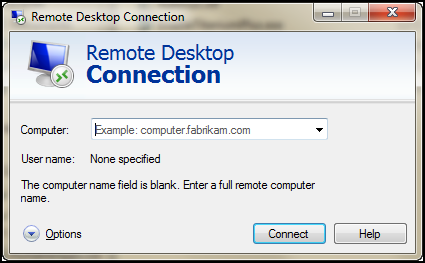
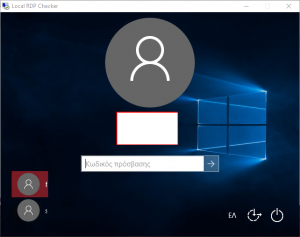
    • Finally, RDPCheck connects successfully
      Successfull Connection with RDPChack
      Successful Connection with RDPCheck

      .

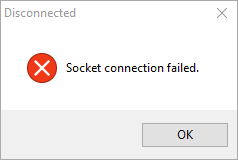
    Example of unsuccessful connection:

    2015-12-28 18_56_08-Disconnected 2015-12-28 18_55_35-Local RDP Checker


  • ban ips with fail2ban

    https://wireflare.com/permanently-ban-repeat-offenders-with-fail2ban/