This is nice short article clarifying the terms centralised, decentrilised and distributed with great examples.
https://medium.com/@bbc4468/centralized-vs-decentralized-vs-distributed-41d92d463868
This is nice short article clarifying the terms centralised, decentrilised and distributed with great examples.
https://medium.com/@bbc4468/centralized-vs-decentralized-vs-distributed-41d92d463868
This works for hotmail.com, live.com, outlook.com and possibly other microsoft related email addresses.
Use this form to request removal:
http://go.microsoft.com/fwlink/?linkid=614866
Make sure you ‘re registered:
https://postmaster.live.com/snds/data.aspx
This was an old one and does not seem to work anymore:
https://support.live.com/eform.aspx?productKey=edfsmsbl3&ct=eformts&scrx=1
Source:
https://answers.microsoft.com/en-us/outlook_com/forum/oemail-osend/hotmailoutlook-blacklist-removal-form/86c71c17-80c9-48e9-b822-1d3678f19673
Do you have a test environment that is getting this issue with PHP 5.6 and osTicket 1.10?
If so try something for me to see if your issue goes away (I am unable to replicate this error):1.) Go to {osTicket directory}/include/pear/Net/SMTP.php line 173 and change this line:‘ssl’ => array(‘verify_peer_name’ => false)to this‘ssl’ => array(‘verify_peer’ => false, ‘verify_peer_name’ => false)2.)Go to {osTicket directory}/include/pear/Mail/smtp.php line 141 and change this line:$timeout = null;to this$timeout = 60;
mysqladmin -u username -p create NEW_DB_NAME
mysqldump -u root -pPASSWORD OLD_DB_NAME|mysql -u root -pPASSWORD NEW_DB_NAME

rsync -av --progress src/ user@server:dest/
scp should also do the job but rsync is better
scp -rp src user@server:dest/
Nice explanation about the differences can be found here:
http://stackoverflow.com/questions/20244585/how-does-scp-differ-from-rsync
—
scp basically reads the source file and writes it to the destination. It performs a plain linear copy, locally, or over a network.
rsync also copies files locally or over a network. But it employs a special delta transfer algorithm and a few optimizations to make the operation a lot faster. Consider the call.
rsync A host:B
rsync will check files sizes and modification timestamps of both A and B, and skip any further processing if they match.
If the destination file B already exists, the delta transfer algorithm will make sure only differences between A and B are sent over the wire.
rsync will write data to a temporary file T, and then replace the destination file B with T to make the update look “atomic” to processes that might be using B.
Anther difference between them concerns invocation. rsync has a plethora of command line options, allowing the user to fine tune its behavior. It supports complex filter rules, runs in batch mode, daemon mode, etc. scp has only a few switches.
In summary, use scp for your day to day tasks. Commands that you type once in a while on your interactive shell. Its simpler to use, and in those cases rsync optimizations won’t help much.
For recurring tasks, like cron jobs, use rsync. As mentioned, on multiple invocations it will take advantage of data already transferred, performing very quickly and saving on resources. It is an excellent tool to keep two directories synchronized over a network.
Also, when dealing with large files, use rsync with the -P option. If the transfer is interrupted, you can resume it where it stopped by reissuing the command.
https://mydnic.be/post/laravel-5-and-his-fcking-non-persistent-app-setlocale
Assuming you have followed my previous guide on installing erpnext on a fresh ubuntu instance (http://blog.grs.gr/?p=518&lang=en), we will show you how to install a second site on the same server (DNS based multitenancy).
This guide is based on https://github.com/frappe/bench, and is tested a couple of times against ubuntu 14.04/64.
apt-get update

apt-get upgrade

dpkg-reconfigure tzdata

apt-get install nano
adduser erpnextStore password in a safe place for later use.
visudo (to grant erpnext user sudo privileges, by copying root record)A nice article on user management: https://www.digitalocean.com/community/tutorials/how-to-add-and-delete-users-on-an-ubuntu-14-04-vps
su erpnextcd ~wget https://raw.githubusercontent.com/frappe/bench/master/playbooks/install.pysudo python install.py --production --user erpnext
You will prompted for mysql and admin passwords.
Store both passwords in a safe place for later use.
The script is going to take some moments to complete depending on hardware, let’s say 5 or 10 minutes.
sudo service nginx restart.You’re amost done. To increase security you should install ssl. We’ll use let’s encrypt for our example.
su erpnextcd ~cd frappe-benchmv sites/site1.local sites/example.comnano sites/example.com/site_config.json "host_name": "https://example.com",Don’t forget commas separating json records.
bench config dns_multitenant onbench setup nginxsudo service nginx reloadsudo -H bench setup lets-encrypt example.comIf errors occur, recheck all your steps. If https/ssl still fails, try the manual method below.
su rootcd /optwget https://certbot.eff.org/sudo service nginx stop./opt/certbot-auto certonly --standalonesu erpnextcd ~/frappe-bench/sites/example.comnano sites/example.com/site_config.json"ssl_certificate": "/etc/letsencrypt/live/example.com/fullchain.pem",
"ssl_certificate_key": "/etc/letsencrypt/live/example.com/privkey.pem"
, save and exit nanobench setup nginx, to regenerate cofig files.sudo service nginx restartNow, you should be ok with letsencrypt cert. Letsencrypt certificate expires every three months, so you’d better set up a cronjob that automatically renew certificate. It should be as easy as adding a crontab entry.
crontab -e# renew letsencrypt certificates on 1st monday of every month and get an email if it gets executed
MAILTO="[email protected]"
0 0 1-7 * * [ "$(date '+\%a')" = "Mon" ] && sudo service nginx stop && /opt/certbot-auto renew && sudo service nginx startYou’re done.
Official frappe documentation provides an article for https/ssl:
https://frappe.github.io/frappe/user/en/bench/guides/lets-encrypt-ssl-setup.html
If you want to install a second site on the same server see this:
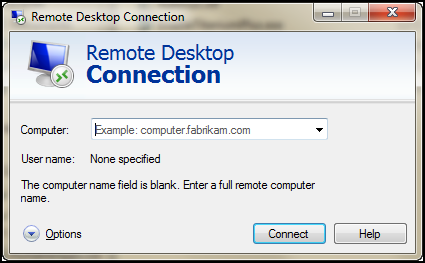
One of the main differences between Windows 10 Pro and Windows 10 Home is the lack of the remote desktop service for the latter. But thanks to this wonderful project rdp service is not a barrier any more.
We have tested this solution in two different Windows 10 Home machines and it works great.


.
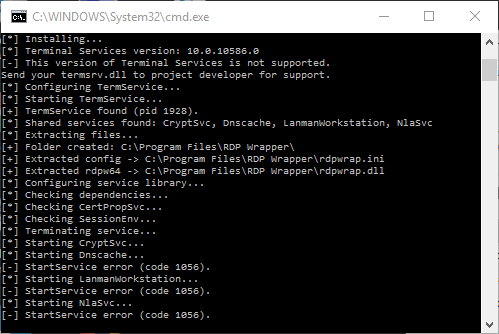
Example of unsuccessful connection:


https://wireflare.com/permanently-ban-repeat-offenders-with-fail2ban/